Professional Photographers in Santa Rosa Beach
  • Home
  • Session
    • Group Session
    • Classic Session
    • Mini Session
    • High School Seniors
  • Portfolio
    • Family
    • Couples
    • Senior Portfolio
    • Maternity
    • Pet
  • Locations
  • Contact / Book
  • Blog
  • Weddings
  • Emerald Coast Art Co.
cheap photographer in south walton florida

Family Beach Photographers from Destin to 30A


Access Octomono Masonry Settings

My Favorite Drawing Supplies for Beginners

8/3/2026

0 Comments

 
​​You don't need a huge collection of art supplies to learn how to draw. In fact, I think it's much easier to learn when you start with a few good, basic tools and understand how to use them.
These are the drawing supplies I use and recommend. Some are important from the beginning, while others are useful as you move from practicing basic skills to creating more finished artwork.
* The links in the blog are Amazon affiliate links, which provide a tiny kickback to support our studio if you use them! 
Drawing Pencils
A good set of graphite pencils is the first thing I recommend.
I particularly like STAEDTLER Mars Lumograph Black Drawing Pencils because of their matte finish. Traditional graphite can become shiny, especially as you build up darker values. These pencils create rich, smooth darks without as much of that graphite shine.
They also blend beautifully, which makes it easier to create gradual changes from light to dark.
You don't need every pencil grade ever made. A small set with a range of light, medium, and dark pencils is plenty for learning.

My pick: STAEDTLER Mars Lumograph Black Drawing Pencils, 6-Pack
realistic dog drawing
A Kneaded Eraser
A kneaded eraser is one of those funny-looking art supplies that doesn't seem particularly exciting until you learn what you can do with it.
Unlike a traditional eraser, a kneaded eraser can be stretched, rolled, and shaped to fit whatever you're working on. You can form it into a point to lift graphite from a tiny area or flatten it to lighten a larger section.
It also essentially cleans itself. Instead of rubbing away and leaving eraser crumbs all over your paper, you knead the graphite back into the eraser.
And an eraser isn't only for fixing mistakes! In drawing, we can actually use the eraser as another drawing tool, pulling highlights and details back out of shaded areas.

My pick: PRISMACOLOR Design Kneaded Rubber Eraser
​Blending Stumps & Tortillons
Your fingers are always conveniently attached to you, but they're not necessarily the best blending tools.
Skin contains natural oils that can transfer to your paper and affect the graphite. Blending stumps and tortillons give you much more control.
I use them to soften shadows, create gradual transitions, and develop different textures without losing control of the drawing.
They come in several sizes, and an inexpensive assorted set is all you really need.
I like this set, it comes with all the sizes I normally use plus the sharpener and soft foam sticks for larger areas.

My pick: Haojiaho Blending Stumps
drawing tools
Drawing Paper for Learning & Practice
Not every drawing needs to go on expensive paper.
For practicing techniques, working through exercises, sketching ideas, and simply learning, I like a good drawing pad.
The Strathmore 300 Series Drawing Pad has 70 lb. paper with enough texture for graphite while still being affordable enough that you don't feel like every sheet has to become a masterpiece.
That's actually important when you're learning. You need to be willing to use the paper.

My pick: Strathmore 300 Series Wire Bound Drawing Pad, 9" × 12", 70 lb., 50 sheets

 Bristol Paper for Finished Artwork 
Once you're ready to create a more finished drawing, I prefer smooth Bristol paper.
Bristol is heavier and sturdier than everyday sketch or drawing paper and gives you a beautiful surface for detailed work. The smooth finish is especially nice when you're working with graphite and mechanical pencils because you can create very fine details and clean edges.
I wouldn't use Bristol for everyday exercises—it would get expensive quickly. Save the good stuff for artwork you intend to finish and keep.

My pick: Strathmore 300 Series Smooth Bristol Paper Pad, 11" × 14", 100 lb.
​A Mechanical Pencil for Fine Details
For most of a drawing, I prefer traditional drawing pencils. But when I get into tiny details, I reach for a mechanical pencil.
A 0.5 mm mechanical pencil gives you a consistently fine point without constantly stopping to sharpen it.
It's wonderful for small details, crisp edges, hair, eyelashes, texture, and those last little touches that can make a finished drawing come alive.

My pick: STAEDTLER Mars micro 0.5 mm Mechanical Pencil
close up of fine line drawing eye
Mechanical Pencil Leads
The lead inside your mechanical pencil matters, too.
I like 2B lead because it's softer and darker than the standard HB lead commonly used for writing. It gives you the precision of a mechanical pencil while still behaving more like a drawing pencil. HB lead is more compact, making it lighter and can leave creases in your paper.

My pick: STAEDTLER Mars micro Carbon Mechanical Pencil Leads, 0.5 mm, 2B
​Clear Rulers — 6" and 12"
A clear ruler is surprisingly useful when you're learning to draw. I recommend having both a 6-inch and a 12-inch clear ruler. Because they're transparent, you can still see your drawing underneath while you're measuring or lining things up.
A ruler isn't just for drawing straight lines. It's a great tool for learning to check proportions, distances and placement—for example, comparing the width of an object to its height or checking where one feature sits in relation to another. The 6-inch ruler is easy to maneuver around smaller drawings and details, while the 12-inch ruler is helpful for larger measurements, guidelines, and perspective work.
As your eye gets better at judging proportions, you'll rely on measuring less, but it's a very useful way to train yourself to see accurately.

My Picks : 2 Pack Clear plastic ruler 
I like the finger grip on this one so my finger doesn't rub the drawing : Westcott Finger Grip
what supplies to buy for drawing pet images
A Sharpener Made for Drawing Pencils
Yes, the pencil sharpener actually matters.
Artist pencils have different cores than the standard yellow pencil sitting in your junk drawer, and a poor sharpener can break the core, chew up the wood or leave you repeatedly sharpening a pencil that's getting shorter without ever getting sharper.
I prefer a STAEDTLER handheld sharpener designed for their pencils. It gives me the point I want without unnecessarily eating through my drawing pencils.
A sharp pencil isn't just about drawing thin lines, either. Learning how to use different parts of a properly sharpened pencil is part of learning good drawing technique.

My pick: STAEDTLER Double-Hole Pencil Sharpener

Drawing Board— Optional, But Very Useful
You certainly don't need a drafting table to learn to draw, but I do recommend getting your paper off a completely flat tabletop when possible.
A portable drawing board lets you work comfortably in different places and position your drawing at an angle.
More importantly, changing the position of your drawing makes it easier to step back and look at it properly. When we're bent over a drawing on a table, our viewing angle can distort what we're seeing. Bringing the artwork upright helps you check proportions and perspective and catch problems that aren't nearly as obvious when your nose has been six inches from the paper for an hour.
It's also simply nice to be able to take your drawing to the couch, porch or wherever you happen to be comfortable working.

My pick: TX Liteart 13" × 17" Drawing Board with Clip (optional)

You Really Don't Need Much
Art stores can make drawing look as though it requires an entire tackle box of mysterious supplies. It doesn't.
A good set of pencils, kneaded eraser, blending stumps and decent drawing paper will take you a very long way.
As your skills develop, adding Bristol paper, a mechanical pencil and a drawing board gives you a little more control when you're ready to create finished artwork.
Good supplies help—but they don't do the drawing for you. Learning to see shapes, proportions, values, edges and light is what makes the real difference.
Start with the basics, learn what each tool can do, and then practice. Lots and lots of practice.
0 Comments

DSLR vs. Mirrorless vs. point & shoot: What's the Difference?

7/27/2026

0 Comments

 
If you’ve ever bought a “nice camera” hoping to take better photographs, only to discover a collection of buttons, dials, settings, and numbers you don’t understand, you’re definitely not alone.Modern cameras can do an incredible amount — but you don’t need to understand everything they can do before you start taking control of your photography.
Let’s start with the basics.

What Is a DSLR Camera?
A DSLR is a digital camera that uses a mirror inside the camera to let you see through the actual lens when you look through the viewfinder.
For many years, DSLRs were the standard camera used by professional and serious amateur photographers. Canon and Nikon made many of the most popular models, and there are still a tremendous number of excellent DSLRs in use today.
One of their biggest advantages is control.
Instead of asking the camera to make every decision for you, a DSLR allows you to get off auto and into manual, allowing you to control things like:
  • How bright or dark the photograph is
  • Whether movement is frozen or blurred
  • How much of the photograph is in focus
  • How soft or blurry the background appears
  • How the camera responds to different lighting situations

And, unlike most point-and-shoot cameras, DSLR cameras allow you to change lenses depending on what and how you want to photograph.

What Is a Mirrorless Camera?
A mirrorless camera gives you much of the same creative control as a DSLR, but it works a little differently.
As the name suggests, it doesn't have the internal mirror found inside a DSLR. Instead, the image coming through the lens is displayed electronically on the screen or through an electronic viewfinder.
Mirrorless cameras are newer technology and have become increasingly popular with both professional and hobby photographers.
For a beginner, though, the most important thing to understand is simple:
Both DSLR and mirrorless cameras give you the ability to move beyond automatic mode and actually control how your photograph is created.

DSLR vs. Mirrorless: Which Is Better?

You can take beautiful photographs with either.
Mirrorless cameras generally offer newer technology, while DSLRs have been around longer and have an enormous selection of cameras and lenses available — including many on the used market.
If you already own either type, you have a very capable tool for learning photography.
Learning how to control your camera will make a much bigger difference than simply owning the newest one.

What About Point-and-Shoot Cameras?
A point-and-shoot camera is designed primarily for convenience.
You point it at your subject, press the shutter button, and the camera handles most of the decisions for you.
That's useful when your goal is simply to capture the moment. But it becomes limiting when you want to decide how the photograph should look.
For example, perhaps you want to photograph a child running and completely freeze the movement. Or maybe you intentionally want movement to blur.
Maybe you want your subject sharp against a beautifully soft background.
Those choices require more control over the camera.
That ability to make creative decisions is one of the biggest advantages of learning to use a DSLR or mirrorless camera manually.


Picture
What About Lenses?
If your camera came with a lens, it probably came with what is commonly called a kit lens. A typical example is an 18–55mm zoom lens.
A zoom lens allows you to change your view without changing lenses. At 18mm you can capture a wider scene, and as you zoom toward 55mm your view becomes tighter.
Zoom lenses are convenient, but there is one thing beginners should understand about many inexpensive zoom and kit lenses.

Why Does My Exposure Change When I Zoom?
You may see numbers printed on a kit lens that look something like:
18–55mm f/3.5–5.6
Don't worry if those numbers mean absolutely nothing to you yet!
The important part is that many kit lenses cannot use the same widest aperture throughout the entire zoom range.
For example, your lens may allow you to use f/3.5 when you're zoomed out, but as you zoom in, the widest available aperture may change to f/5.6.
That means you can carefully set your exposure, zoom your lens to reframe the photograph, and suddenly discover that one of your settings has changed.
There is nothing wrong with the camera or the lens. That's simply how that particular lens is designed.
But when you're first learning how aperture, shutter speed and ISO work together, having another number change while you're trying to understand everything else can be confusing.

Why I Like a Prime Lens for Beginners
A prime lens has one focal length and doesn't zoom. A 50mm lens, for example, is always 50mm.
At first, not being able to zoom may sound like a disadvantage. When you're learning photography, however, I actually think it can be an advantage.
You have fewer variables to think about.
Instead of zooming the lens, you move yourself. Step closer. Step farther away. Look at your subject from another angle. Decide what belongs inside the frame.
A prime lens also typically allows for a much wider aperture than an inexpensive kit lens. A common 50mm f/1.8 lens, for example, gives you more flexibility in lower light and makes it much easier to experiment with shallow depth of field and those soft backgrounds everyone loves.
Most importantly for a beginner, the lens stays consistent while you're learning what your camera settings actually do.
Do I Need a Prime Lens?
Absolutely not.
If you already have a kit or zoom lens, you can learn photography with it. There is no reason to think you have the “wrong” lens.
But if you're just beginning and would like to add an inexpensive lens to your camera bag, a 50mm prime is one of my favorite lenses for learning photography.
Basic 50mm lenses can be surprisingly affordable — some are available for around $150.
Before purchasing one, make sure you choose a lens that is compatible with your specific camera body. Canon, Nikon, Sony and other manufacturers use different lens mounts, and even cameras from the same manufacturer don't necessarily use the same lenses.
[Amazon link: this is the prime lens I use with my Canon Beginner 50mm Prime Lens Options]
If you're unsure which lens fits your camera, check your exact camera model before ordering.
And if you already own a zoom lens?
Keep it. As you learn more, you'll begin to appreciate the flexibility of a zoom lens and understand when you might choose it instead.
The goal isn't to decide that one type of lens is “better.”
It's to understand what each lens does so you can choose the right tool for the photograph you want to make.
The most important tip.
Keep your book! It has very valuable advice on how your particular camera works.
0 Comments

WHY PURCHASE PRINTS WITH FREE DIGITALS?

7/25/2026

0 Comments

 
1) WHERE YOU PRINT MATTERS.
Your digital image will be in the size of 14x10 which is closest standard to what the camera originally captures. This means when you print larger than 14x10 the printer has to double or expand the pixels (dots of color that make up the image). When using a professional company they are better equipped to handle the enhancement. Did you know a printing kiosk generally only contains the three primary colors?

2) WE CAN EDIT FOR THE SIZE AND PRODUCT
We edit images for the size and product when we know what that will be. For instance, for small prints we make them extra sharp and are able to crop in closer for a more dynamic image. When prepping for large prints we make them less sharp so the small spots are not misplaced when the printer interpolates the pixels and use a muted range of bold colors as to not overwhelm the viewer. Different products, such as albums, canvases, fine art paper, and prints, demand distinct editing techniques. 

3) KNOWING IT IS YOUR FAVORITE WE CAN SPEND THE TIME EDITING TO PERFECTION
When editing we do not know your plan for each image, with some possibly never being showcased. As a result, while we aspire to achieve perfection in our edits, we must balance efficiency, understanding that extensive editing may not be warranted for every image. When we know it is an image you love and want to be printed and shown off we can spend a little more time making sure the image is absolute perfection.

4) WE CAN HELP YOU DECIDE THE BEST OPTION FOR YOUR BUDGET
You may have a favorite image but not know what to do with it. What room would it look good in? Should you get a wall collage or one large showpiece? Should you get a canvas or a framed print? If you want to remember the time spent with loved ones you may want an album. However, let's say you had a small mini session. You probably would get more out of your money with a framed print that can be updated the next year as the children grow. Do you know how many clients buy $500 worth of 5x7 prints when they could have gotten an album with all the prints from the session and paid only $50 at Mpix for their 5x7's? The quality is similar at that size.
Picture
0 Comments

Print Release vs Copyright: A Simple Guide for Families

6/14/2026

0 Comments


What is the Difference Between Print Rights and Copyright?

the difference between print rights and copyright
​When you receive your gallery from a professional photographer, you'll often hear the terms print rights and copyright. While they sound similar, they are actually very different things.
Understanding the difference helps you know exactly what you can do with your images—and what remains the photographer's responsibility.
What Is Copyright?Copyright is the legal ownership of a photograph.
In the United States, the photographer automatically owns the copyright to any image they create. Copyright gives the photographer the exclusive right to:
  • Reproduce the photographs
  • Sell the photographs
  • Publish the photographs
  • License the photographs for use
  • Create derivative works or alterations
  • Control how the images are distributed
Simply put, copyright means the photographer owns the artwork.
When you hire a photographer, you are purchasing their time, expertise, and the rights granted in your contract—not ownership of the images themselves.

What are Print Rights?

Framed professional photographs


​​Print rights allow families to print and enjoy their images for personal use.
Print rights are permission granted by the photographer for personal use.
When a photographer provides print rights, they are allowing you to:
  • Download your images
  • Print your images at the lab of your choice
  • Share your images with family and friends
  • Post your images on personal social media accounts

Print rights do not transfer ownership of the photographs.
You are receiving permission to use the images for personal purposes while the photographer retains copyright ownership.
What You Can Do With Images That Include Print RightsMost family photography clients may:
✓ Print photographs for their home
✓ Order holiday cards
✓ Share images on Facebook and Instagram
✓ Email images to family members
✓ Create personal photo albums
✓ Display photographs in their home

These are all considered personal uses and are generally covered under a standard print release.
What You Cannot Do Without Permission. Because the photographer still owns the copyright, there are some things that are not permitted without written permission.
These typically include:
✗ Selling the photographs
✗ Entering the images into contests
✗ Using the photographs for advertising or commercial purposes
✗ Editing or altering the images
✗ Removing watermarks
✗ Claiming the images as your own work

Photographers automatically own the copyright to the images they create.

Why Professional Photographers Retain Copyright

Copyright protection allows photographers to maintain the quality and integrity of their work.
It ensures that images are displayed as intended and helps protect the creative investment involved in creating them.
For many photographers, their portfolio is their livelihood. Copyright allows them to continue showcasing their work while still providing clients with the freedom to enjoy and print their images.
What Amy & Caitie Photography ProvidesAll digital image collections from Amy & Caitie Photography include a personal print release.
This allows you to print your photographs for personal use and share them with family and friends while the copyright remains with the photographer.
We want you to enjoy your images for years to come—whether that means creating albums, displaying wall art, or filling your home with memories from your family's time at the beach.


The Simple Version:
Copyright = Ownership
Print Rights = Permission


You receive permission to print and enjoy your photographs.
The photographer retains ownership of the artwork itself.
Both work together to give you the freedom to use your images while protecting the creative work behind them.
Picture
​Your photographs were made to be enjoyed long after your vacation ends.
0 Comments

How to reserve a day pass for Henderson Beach State Park

5/22/2026

5 Comments

 
Picture
Trying to figure out the new reservation system for Henderson Beach State Park? You are not alone. The new Florida State Parks booking system has confused a lot of visitors, especially when the website redirects to the wrong pages. Here’s a simple step-by-step guide showing exactly how to reserve your Henderson Beach day-use pass online without losing your mind.
​Step 1: Open the Henderson Beach Reservation Page
Be sure to use this link: ​https://reserve.floridastateparks.org/Web/#!park/26 reserve.floridastateparks.org/Web/#!park/26
Henderson State Park day pass

Step 2: Create a Florida State Parks Account
​ You will be required to create an account before adding to your cart.
After creating an account or logging in, you should return to the same page. 
If it does not, check out the troubleshooting section at the bottom of the page.
Picture

Step 3: Choose your pass
  • ​Click on either the east or west Day-Use Vehicle Entry.
  • Everyone entering the park currently needs a reservation, including walk-ins.
  • ​You do NOT want the "Loop", that is for camping.
simple guide to buying a day pass
​

 Step 4: Choose your date
  • The green squares are the available days. Pick your day and click "Book Now”
(Ignore the X  below the green boxes. It does NOT mean it is sold out. If the square is green, it is available)
Picture

Step 5: Complete Checkout
Fill in the information and click "Reserve Unit". 
Picture

Step 6: Print or Screenshot your email receipt
  • You will need the bar code that was sent to you in an email to enter the park.
  • I recommend printing it out or taking a screenshot on your phone so it’s easy to access at the gate.​
Picture

Picture
Picture

Henderson Beach Reservation FAQs
  • Do you need reservations for Henderson Beach State Park?​
Yes, you will need to obtain your pass online to enter the park. 
  • Can you still use a Destin Beach Pass?
Yes, you can use your pass, however, you will still need to make a reservation online. You will enter your pass information to obtain your free reservation. 
  • How far in advance can you reserve Henderson Beach?
You can reserve your pass as far as 60 days out.
  • What happens if Henderson Beach reservations are full?
You will not be allowed to enter the park if the reservations are full. Keep checking back, there may be cancellations that will open a spot. 
  • Do they offer refunds?
Yes, you can cancel your reservation and receive a refund. 
Can you reserve Henderson Beach the same day?

Yes, you can.

Leave a comment below and let us know what you think about the new process! 
5 Comments

Planning Family Photos on 30A (What to Know Before You Book)

4/24/2026

5 Comments

 
Picture
Planning family photos at the beach should feel exciting—not stressful.
If you’re visiting 30A, Destin, or Santa Rosa Beach, there are just a few simple things that can make a huge difference in how your photos turn out.
After years of photographing families along the Emerald Coast, here’s what actually matters (and what doesn’t)
When to Schedule Your Session
The biggest factor in beautiful beach photos is light.
We schedule sessions in the hour before sunset, when the sun is lower, softer, and more flattering. Midday light is harsh, creates strong shadows, and can make everyone squint—so we avoid it whenever possible.
If you’re visiting, try to book your session early in your trip.
That way:
  • No one is sunburned yet
  • We have flexibility if the weather needs to shift
  • You’re not stressed trying to fit it in at the last minute 
Choosing the Right Type of Session
Not all sessions are created equal, and choosing the right one makes everything easier.
  • Mini Sessions
    Best for small groups who want something quick and simple. Limited time means less variety and less flexibility.
  • Classic Sessions
    The most popular option. More time for natural posing, movement, and a relaxed pace.
  • Group Sessions
    Ideal for large families or multiple families together. More time is needed to organize and capture everyone well—especially with young children.
  • ​If you’re unsure, we’ll help guide you based on your group size and what you’re hoping for.
Picture


​Best Locations Along 30A

We photograph along the Gulf Coast from Destin to Panama City Beach, including all of 30A—Grayton Beach, WaterColor, Seaside, Seagrove, Alys Beach, Rosemary Beach, and more.
Most families choose the beach, but we also have beautiful parks and town areas, depending on the look you want.
A few important notes:
  • Some communities like Alys Beach and Rosemary Beach require permits
  • Others require you to be a guest or homeowner to access certain areas
We’ll help you choose a location that fits your style and make sure everything is set up properly ahead of time.
What to Wear for Beach Photos
​
This is one of the most common questions—and it makes a big difference.
A few simple guidelines:
  • Stick with light, neutral colors
  • Avoid logos and bold patterns
  • Softer, flowy fabrics photograph beautifully
  • Coordinate, don’t match exactly
The goal is to keep the focus on your family—not the clothing. We go a little more in depth in the article "What to Wear for Beach Photos" 
​What to Expect During Your Session
Most people feel a little unsure about being in front of the camera—and that’s completely normal.
You don’t need to know how to pose.
We guide you the entire time:
  • Where to stand
  • What to do with your hands
  • How to interact naturally
We keep things moving so it feels relaxed, not stiff or overly posed. The best images come from natural moments, not forced smiles.
​


​What About Kids?
​
If you’re worried about your kids not cooperating—you’re not alone.
There is almost always one child who decides that this is the moment they’re not interested. 
That’s okay.
We are experienced in working with children and adjust as needed. Movement, play, and flexibility are built into the session so we can still capture genuine expressions without pressure.
You can read about our favorite tips on photographing children HERE.
Picture
​Special Situations & Comfort
Every family is different, and we approach sessions with that in mind.
Whether it’s:
  • A child on the spectrum
  • Someone who feels uncomfortable in photos
  • A large or blended family
We take the time to make everyone feel at ease and create an experience that works for you.
After Your Session
​
After your session, your images are carefully edited and delivered in an online gallery.
Typical turnaround time:
  • 2–4 weeks
  • Summer months: up to 3–5 weeks
From there, you’ll be able to download your images and order prints if you’d like.
Curious about our editing process? You can read about it HERE. 
Picture
​Ready to Plan Your Session?
​
If you’re thinking about booking family photos along 30A, we’d love to help.
Tell us your dates, your group size, and what you’re hoping for—we’ll guide you through the rest and make the process simple and stress-free. You can reach us at [email protected] or through our contact form.
5 Comments

What to Wear for Beach Photos

1/10/2026

1 Comment


What to Wear for Beach Photos: A Simple Guide for Families

As family photographers in Destin, Santa Rosa Beach, and along 30A, one of the most common questions we hear is, "What should we wear for beach photos?"
The good news is that choosing outfits doesn't have to be stressful. A few simple guidelines can help your family look coordinated, comfortable, and timeless in your portraits.
When planning outfits for beach portraits, the goal isn’t perfection or matching head-to-toe. The goal is coordination, comfort, and clothing that feels like you on your best day. What you wear helps tell the story of who you are as a family, and it should feel natural, not forced.
Table of Contents
  • Start With the End in Mind
  • Coordinate, Don't Match
  • Fabrics Matter More Than You Think
  • Sleeves, Waistlines and Fit
  • Patterns, Logos and What to Avoid
  • Color Palettes that Always Work
  • Dressing Kids
  • Practical Beach Tips
  • A Note for Mom
  • Frequently Asked Questions About What to Wear for Beach Photos
Group wearing coordinated outfits during a beach session in destin florida

Read More
1 Comment

How to Print Digital Artwork at Home | Professional Printing Tips

12/13/2025

0 Comments


How to Print Digital Artwork (So It Actually Looks Good)

​Printing digital artwork should be simple—but a few common mistakes can turn a beautiful image into something flat, muddy, or pixelated. This guide walks you through how to get the best possible results, whether you purchased a digital print or are printing artwork for your home.
I’ve been a professional photographer for over 15 years and hold a Bachelor of Fine Art degree. I prepare every image with printing in mind, but the final result depends heavily on how and where it’s printed.
This article will help you avoid the usual pitfalls.
Picture

First Things First:
​ Download on a Computer (Not Your Phone or iPad)

​This is the most common issue I see.
Do not download your files on a phone or tablet.
Mobile devices often:
  • Compress files
  • Change file names
  • Reduce resolution
  • Strip important print data
Even if the image looks fine on your screen, it may print soft or blurry.
​
Always download your files using a laptop or desktop computer.
Once downloaded, you can transfer the file if needed—but the initial download matters.

Picture

​Where You Print Matters (A Lot)
Not all printers are created equal
Recommended Print Labs
For consumer-quality professional results, I recommend:
  • MPix.com – consistent color, excellent paper options
  • Nations Photo Lab – another solid, reliable choice
These labs use professional printers and proper color management, which makes a noticeable difference—especially for large prints.

Why I Don’t Recommend Store Kiosks
Most big-box store kiosks:
  • Use limited color ink sets (often only 3 colors)
  • Automatically alter images
  • Print too dark or muddy
  • Lose detail in skies and shadows
They’re fine for quick snapshots—not artwork.

Paper Choice: Keep It Simple
For wall art, these finishes work best:
  • Matte – soft, timeless, no glare
  • Luster – slight sheen, good detail, very popular
Glossy paper is not recommended for large wall art due to reflections and fingerprints.

Color Differences Are Normal
​
Every screen displays color differently.
Your phone, tablet, laptop, and TV are all calibrated differently, and printers interpret color in their own way. Small variations in warmth, brightness, or contrast are completely normal and do not indicate a problem with the file.
This is one reason professional labs produce more consistent results.

​About Print Rights

Your purchase includes personal print rights, meaning you may print the artwork for yourself or your home.
Print rights do not allow:
  • Resale
  • Redistribution
  • Commercial use
  • Uploading to other websites
If you have questions about usage, feel free to reach out before printing.

TV Screensaver Files
If your download includes a TV screensaver file, it is sized specifically for modern flat-screen televisions.
Use the file as provided—no resizing needed.

Final Tips for Best Results

  • Download files on a computer
  • Use the correct file size
  • Choose a professional lab
  • Avoid kiosks for artwork
  • Keep paper finishes simple
  • Expect minor color variation
If you’d like help choosing a print size or lab, I’m always happy to point you in the right direction.
Picture

​When printed correctly, digital artwork can look every bit as beautiful as a traditionally ordered print.

0 Comments

Grayton Beach Engagement Session

12/1/2025

3 Comments

 
I met Mike and Madison at Grayton Beach State Park on one of those summer evenings where the sky shows off just because it can.
Picture

They were instantly comfortable together, laughing, goofing around, and slipping into those quiet moments that make engagement photos feel real instead of posed.
We chased the light, we dodged the tourists, and we ended with the prettiest pastel sunset rolling in.
Easy couple + beautiful place = photographer’s dream.
3 Comments

MINI SESSION WORKFLOW

1/29/2025

5 Comments

 
Picture

MINI SESSION TIMELINE
​

Communication is key in getting what you came for. We will discuss what shots are most important to you and aim to get those first. 
We have found there is a standard list of traditional shots preferred in a family session: family close up and full, couple, individual shots of the children, siblings together close up and full body. We will end the traditional shots with another family shot as the light will have changed by then, providing you with more options. These are the standard traditional shots that are usually printed for walls or wallet size for sharing. We will end the session when the sun gets below the water and we start losing the light. 

AFTER THE SESSION
I upload the images to my computer and back them up on an external hard drive. Then get to work culling and 
editing.
Once completed your images will be uploaded into an online gallery where you can download the full resolution digital files.
We will set up a time to chat and go over your online gallery. You can ask questions and we can help you decide on what to order and get the best choice for your budget. We are fully educated in the printing process and can help you decide what to print at what size. 

​
Picture
WEATHER
Ahh, weather. The only job where you can be wrong 80% of the time.  In a traditional Florida summer it is raining somewhere, it could be a mile down the street and sunny where you are! I have five weather apps that I refer to constantly, I go with three out of five similar forecasts. The short version is we try to wait until the session day and just before everyone begins the process of getting ready to decide. You can read more about the weather policy HERE. For more information on what to expect during windy conditions, you can read HERE.  
TIMING
Timing is especially important in a mini session. Our beach sessions are held just before sunset so we do not have the option of starting and ending late. When the sun is down we are out of time. If you are not sure if you may need longer time let us know. We can begin earlier and if we have everything after 20 minutes great, if not we can go for a Classic session. We have an article you may want to check out titled 'Is a Mini Session right for us?"
We do account for time walking to the location when setting the meeting time so we aim to meet at the agreed upon time. Traffic here is unreliable however so you may want to leave early. We have a lot of bikes and golf carts that like to ride on back beach roads and in most areas there is just 98 so if there is an accident there is no way around it. However arriving early does not necessarily mean we will begin early,  light is everything in portraits. 
We will typically meet in the parking lot and from there we will walk down to the beach while discussing final details.
 I will ask if there is anything you especially want to get or if there is something you are wanting printed large. We will prioritize getting those shots first to capture optimal lighting suitable for large prints. ​
5 Comments
<<Previous
    inlet beach photographers 30a


    ​Amy & CaitiE

    Hello and Welcome!
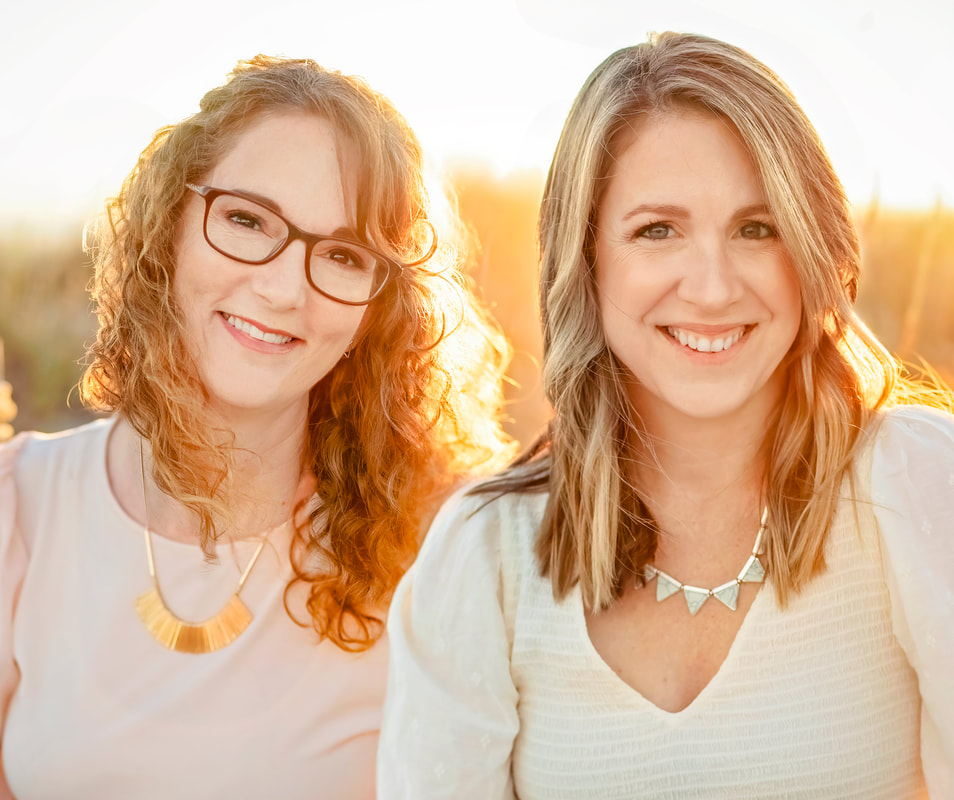
    We are Amy Newsom Susi & Caitie Beth Nelson, two best friends who also happen to be experienced and award winning photographers, artists,  former school teachers, and awesome moms with 9 kids between the two of us! 


    30a Photographers


    Categories

    All
    Behind The Scenes
    Locations
    Printing And Products
    Real Sessions
    Session Prep
    Sessions And Expectations

[email protected]    .    Amy Susi 850.461.1972    .    Caitie Nelson 850.217.5500
Picture
Web design by: Amy Newsom Susi
  • Home
  • Session
    • Group Session
    • Classic Session
    • Mini Session
    • High School Seniors
  • Portfolio
    • Family
    • Couples
    • Senior Portfolio
    • Maternity
    • Pet
  • Locations
  • Contact / Book
  • Blog
  • Weddings
  • Emerald Coast Art Co.